

How to create a Mod?
- Nko Mod

- Jun 19, 2021
- 5 min read
For this new mod, I want to take the time to describe each of the assembly steps, with as many photos and illustrations as possible so that I can make you want to share and discuss ! The post will be completed over the next few days depending on the progress of the watch.
Do not hesitate to send your questions from the contact form.
The case, bezel and crown will be the structure of this mod with a matte black appearance. I share several pieces with you, because my choice remains to be determined on the colors of the dial, the insert and the chapter ring. In particular, I find the color of the insert more bland than I had imagined ...


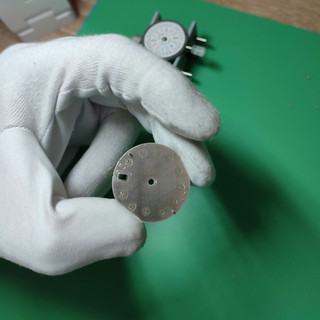
Part n°1 - The dial
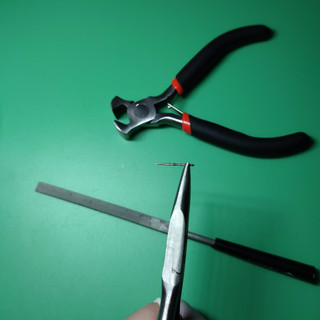
I begin the design by starting with the dial : it has 3 pins on each side, in order to position it according to the orientation of the crown. The crown of our case is at 3 o'clock, so it is necessary to remove the interior pins by turning them delicately with long nose pliers, until they separate from the dial.
It is imperative not to pull / force the pins, so as not to damage the dial !
It is necessary to remove the excess of the pins, by delicately filing the excess. Use gloves or finger stalls, so as not to "pollute" your dial and your movement. The pins must fit into the holes of the movement (NH36) without forcing, you can apply a slight pressure on the contours of the dial. The date must be perfectly aligned.


Once the dial has been installed and a check that the movement is working properly, we will be able to place the hands on the movement. To install the hands, start by winding the mechanism slowly until the date changes. Do not touch the crown anymore !
Now we are going to install the hour hand, in two stages :
> We position the hand on midnight, without fully depressing it to avoid damaging the movement, we leave the date loading area and finalize pressing the hour hand. > We position ourselves at noon to press the minute hand and the trotter, with the appropriate tools !
I advise you to use rodico to hold your needles and the set of tools that I use to install them (n°7404). A watchmaker's magnifying glass for fitting the trotter (magnification x15) is strongly recommended. Check that your hands are working properly, that they are not touching each other and that they are not touching the dial.


The first part of the mod is finished !
Part n°2 - The case
We start this second part of the mod with the box.
We first install the chapter ring in the case. My chapter ring has a centering pin that I must align with the notch on the dial.
If your chapter ring does not have a centering pin, it will be necessary to fix it using 3M so that it does not move. Do not forget to check with a UV lamp for any traces of dust and to clean with a rodico.


We must now carry out the installation of the glass, we begin by placing the seal in a clean box (this seal is normally supplied by the seller of the box).
It is necessary to position the glass and center it on the gasket, so that it fits correctly into the case, without damaging the gasket. If your gasket is "pinched", you will have to remove your glass and put a new seal. Once the centering is carried out, we must press the glass into the case (the choice of cleats is to be adapted to the size of the glass). Squeeze the glass several times, turning your case several times, in order to insert the glass into the case without imbalance.


The glass is perfectly installed and we have completed the second part of the mod !
Part n°3 - The assembly
We are now going to assemble the two parts that we have just made. First, you have to remove the stem from the crown installed on the movement. The crown must be put in "position 0", ie push the crown as far as possible in the movement.
Once the crown has been inserted, we use a thin, pointed object (a toothpick does the job) to gently press on the hole in the part allowing to make the pendulum, and release the stem of the crown. Keep the pressure on the hole and take out the crown, without forcing ! Be careful not to put your fingers on the dial or the hands during this manipulation.
We can now put the dial in the case, the dial must be perfectly aligned with the flange, just as the crown must be aligned with the movement. Do not use force during assembly, if necessary remove the dial from the case and repeat the assembly.


We are going to install our new crown which arrives in two parts upon acquisition: a crown and a stem (adapted to the movement) We screw the crown onto the stem, manipulating the stem from the threaded area so as not to damage it. Then we insert the stem into the movement by gently turning the crown, so that it is installed correctly in the movement, without forcing. If the rod is blocking remove it from the movement (above procedure) and start again.
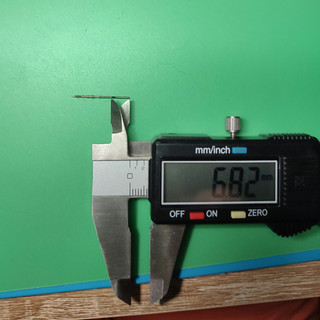
Once the stem is installed correctly, we measure the space between the end of the thread of the case and the crown.


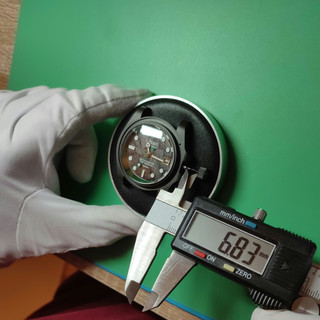
We transfer the measurement to the stem after having unscrewed it from the crown. I advise you to transfer the dimension using a marker. We now cut the rod with the help of wire cutters. We file the rod slightly, in order to equalize the thread on the cut side. We check that the stem is cut to the right size, by inserting it again into the case and checking that it is possible to pass the crown to the three positions. Once everything is good we take out the crown, we apply silicone grease around the crown seal before replacing it definitively.
You can install threadlock on the end of the stem, to ensure the crown is held in place.


It remains to install the gasket of the case back after having greased it, then to screw the case back to the case. While tightening the case back, be careful not to slip to avoid any scratches on the case.


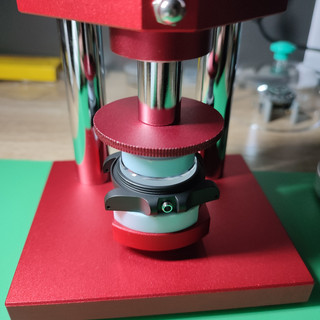
To install the bezel, we must put the metal spring in place in the two polarizers provided on the case. We install the gasket in the bezel after greasing it.


We position the bezel on the case, then on the press with a cleat suitable for the bezel. We press and check that the bezel is properly fitted and that it works perfectly.


All that is missing is the insert to be glued using 3M that you place on the bezel. Care must be taken to ensure that the insert is properly aligned with the dial, the 3M gluing allowing a slight correction.


Our mod is finished, all you have to do is dress it with a bracelet and enjoy it fully ! 😊 Thanks to the SEIKO MOD France group who contributed to the writing of this article.
NKO Mod


Comments